Mesh color adjustment by using a Color Lookup Table (LUT)
Motivation
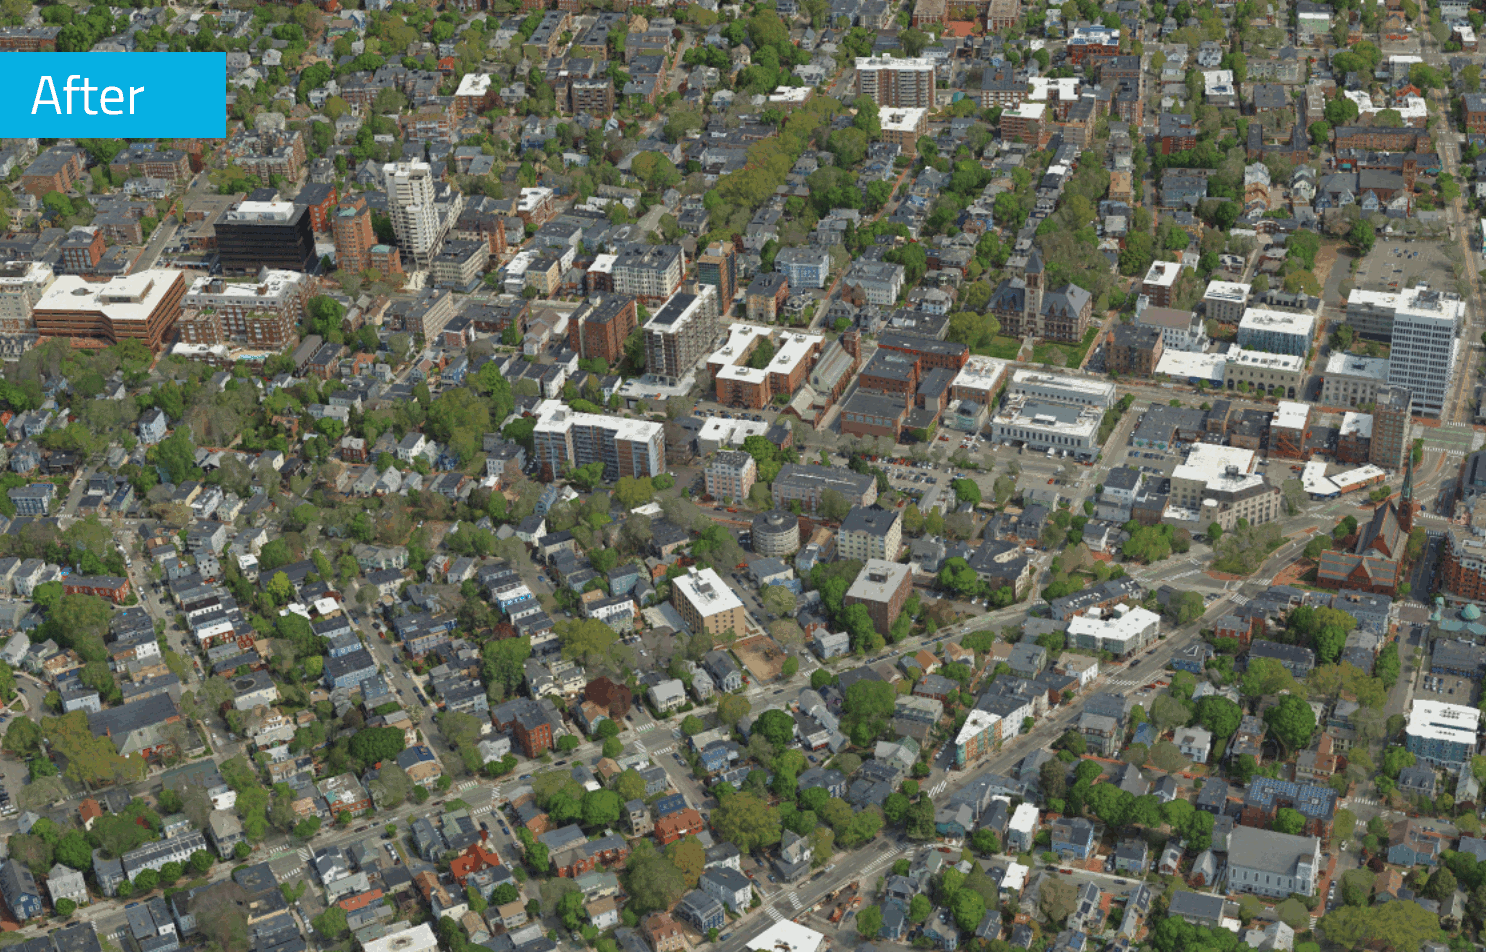
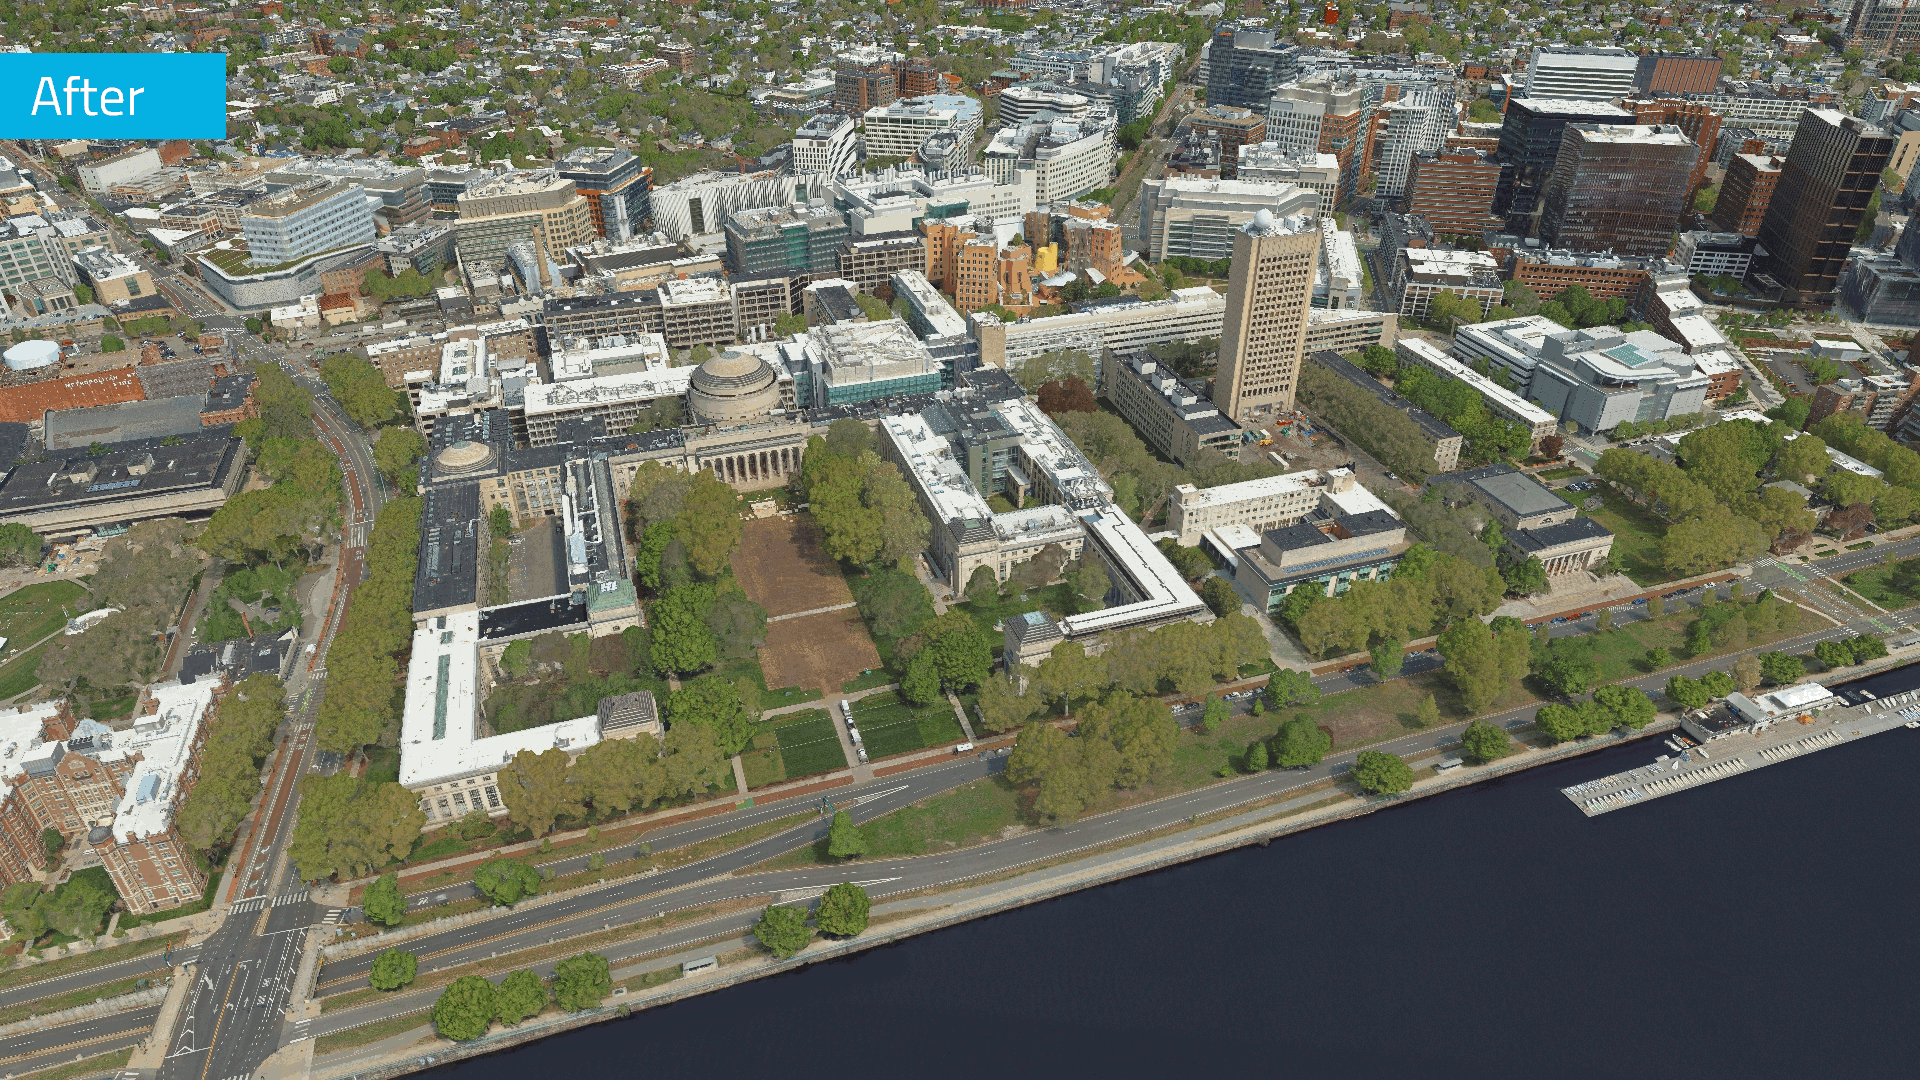
Aerial imagery usually contains a blue haze due to the atmosphere scattering light towards the camera. This effect can be recognized in the final Mesh product and may have a negative impact on the quality. By using a Color Lookup Table (LUT), the colors of the texture can be adjusted in a way that such effects will be corrected. The color adjustment can also be used for other reasons such as making the Mesh appear more color intensive, as shown in these before/after examples:
Step-by-Step Guide
Creating a Color Lookup Table
Generally, a color lookup table can be seen as a picture of colors in which each color corresponds to a new value. It allows to change the color space but also contrast, tones and further adjustments. The Mesh Converter Tool offers the option to apply a LUT file to the texture of the final Mesh product. It is expected to be provided in .CUBE format which can be created in image processing software like Adobe Photoshop, GIMP, etc.
Capture a screenshot of your already produced Mesh having the original radiometry.
Make sure to choose a representative area that covers different parts of the scene such as buildings, vegetation, dark, mid and bright areas, etc. For more variety, you can also stitch multiple screenshots together.
Import the Mesh screenshot to the image processing software of your choice (e.g. Adobe Photoshop, GIMP, etc.).
Apply your desired color adjustments.
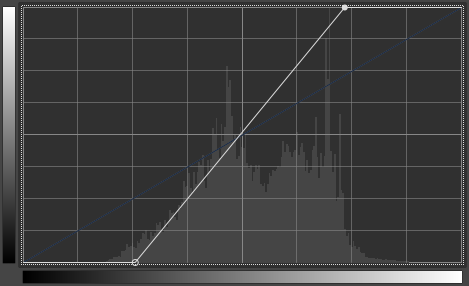
There are various tools available to adjust the colors such as Curves or Levels to correct the tonal ranges, and Contrast or Hue/Saturation to make the scenery appear more bright and vivid. Depending on your project, different adjustments might be suitable. For example:Reduce the blue haze effect by lowering the mid-tone of the blue color channel using the Levels tool from 1.0 to about 0.9.
Increase saturation and contrast by approximately 10 %, each.
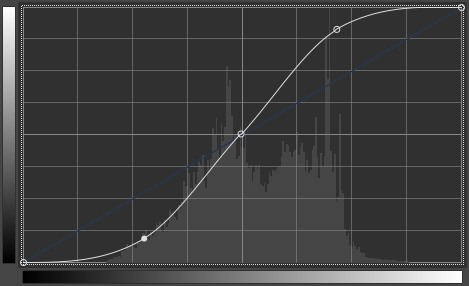
If you increase the contrast, avoid cutting off the darkest and brightest values, as this would result in areas of over- and underexposure, respectively. Instead, define an “S-shaped” transition in the Curve tool, as shown below.
Export the color adjustments as .CUBE LUT file once you have refined the colors of the mesh screenshot to your preference. We recommend a LUT resolution of 32 to 128.
Beware that these color adjusting tools behave differently across different image processing software.
Apply Color Lookup Table to Mesh
Given a .CUBE LUT file, the texture colors of a given .osgb Mesh can be enhanced in a post-processing step. The functionality allows an adjustment for different mesh formats using the MeshConverter CLI or GUI, via the argument --color-adjustment-lookup-table or Color Adjustment Lookup Table field, respectively.
Applying LUT color transformations can slow down Mesh conversions, depending on the selected Mesh formats. This is due to additional operations carried out during the adjustment.