The Influence of Quality Setting in SURE
Intro
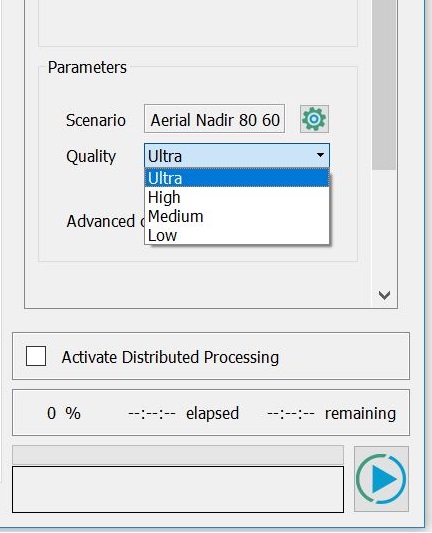
With SURE you can choose to run a Project in Quality Ultra or High. The default Quality varies depending on the scenario.
Scenario | Default Quality |
|---|---|
Aerial Nadir | Ultra |
Aerial Oblique | Ultra |
Default (UAVs, Close Range) | High |
The choice of a Scenario (necessary for the configuration of a SURE Project) implies a default Quality Setting. It is highly recommended to keep this value unchanged during production.
This article elaborates on how the Quality Setting reflects on the results and their production.
Interface
The different quality settings can be set in the GUI and CLI as described below:
GUI
The quality setting is located at the bottom of the processing panel. The quality level can be chosen from the drop-down menu:
CLI
The quality setting can be specified in the CLI using the following flag:
|
|
Functionality
The Quality setting primarily refers to the resolution of the Input Images used to generate the output products. Quality Ultra generally means that the Input Images are used at their original (full) resolution. When choosing Quality level High, the Input Images are down-sampled once, effectively doubling the Ground Sampling Distance (GSD). In a similar manner, the resolution of the images used for texturing is also determined by the Quality setting. In short, the choice of Quality setting has an effect on the resolution of the products and total processing time.
Resolution of results
The level of geometric detail of the resulting reconstruction is dependent on the Quality setting chosen. The depth precision of the reconstructed points is maximized when quality Ultra is used. A higher depth precision leads to an increase in edge sharpness and generally more accuracy in the final results.
If no output GSD is explicitly set by the user, SURE estimates the nominal Ground Sampling Distance of the input images, at the selected quality level, in order to determine the pixel size of the output raster products (DSM, True Ortho).
Ultra | High |
|---|---|
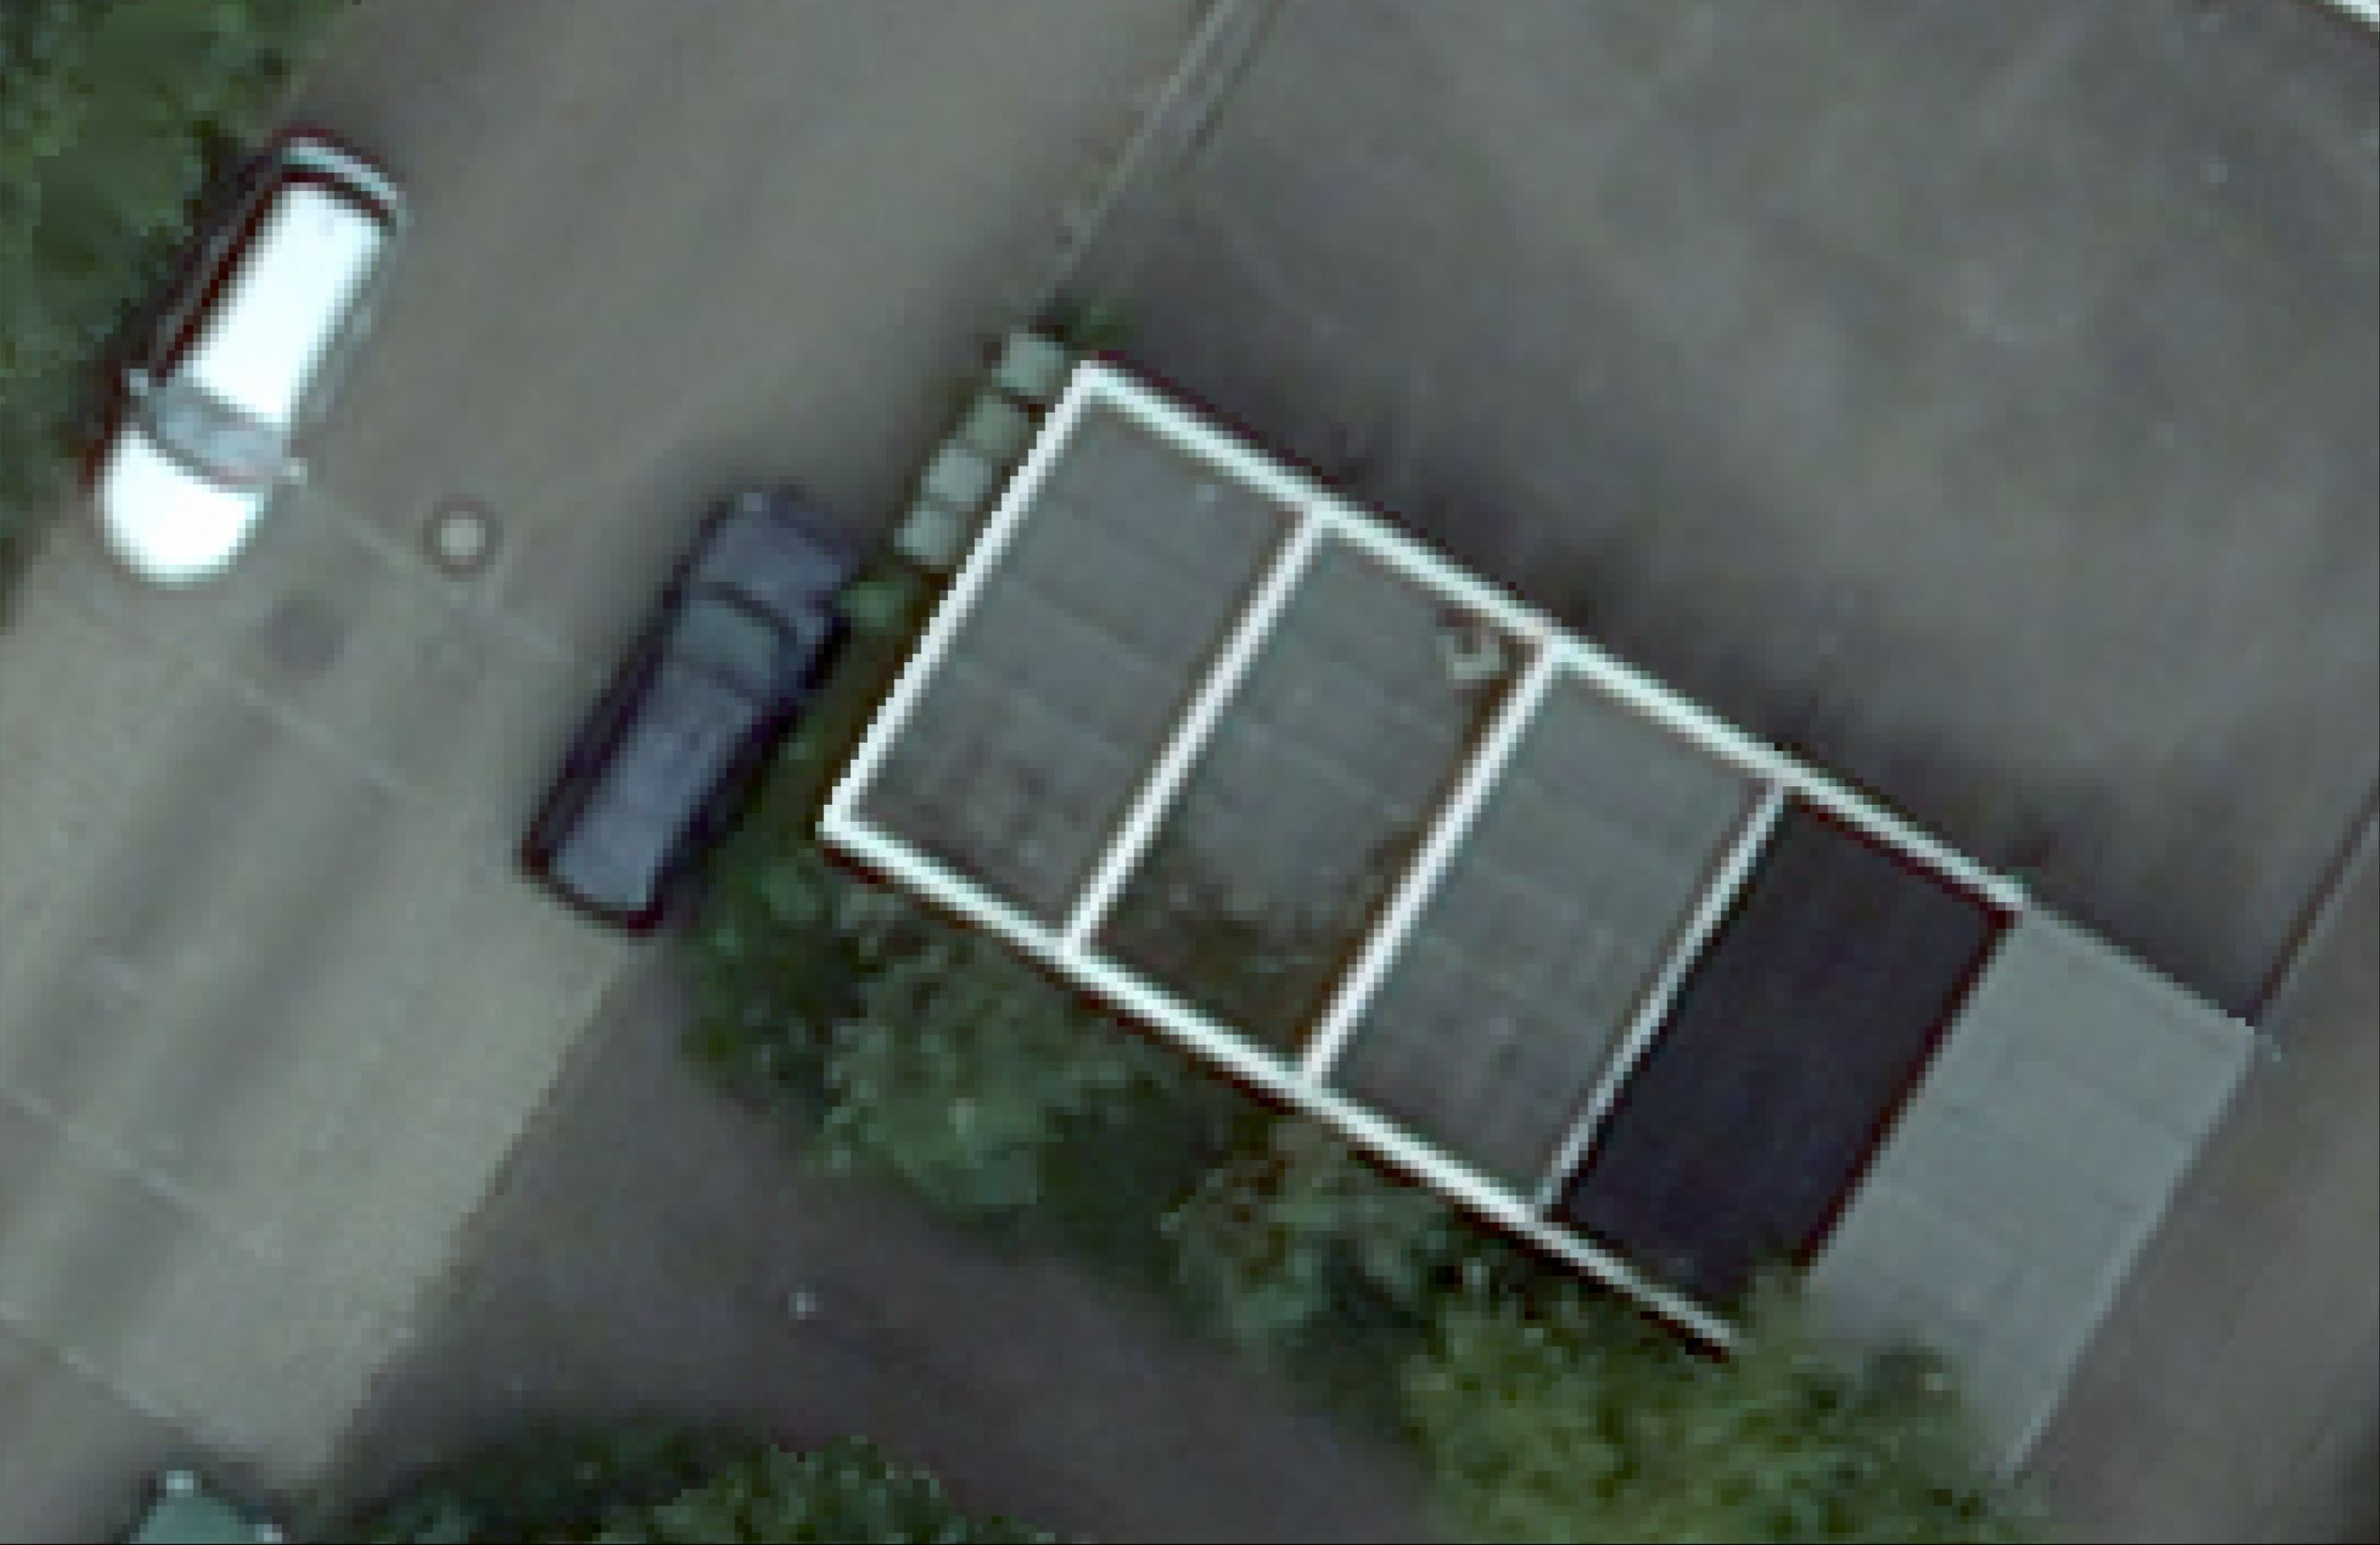 |  |
Processing time and disk space requirement
The number of reconstructed points will naturally decrease as the Quality level is lowered due to the smaller number of pixels in the down-sampled images being matched. For a Nadir project processed in Quality High, the density of points decreases by approximately a factor of 4 when compared to Quality Ultra.
For generating raster products, we recommend to use a GSD parameter, that is equal or greater to the GSD of the Input Images used for Dense Matching.
Best Practice
The following table shows the general Quality setting recommendations based on the type of data collected and desired products.
Applications | Scenario | Products | Recommended Quality Setting |
|---|---|---|---|
Large scale mapping with Nadir camera systems | Aerial Nadir |
| Ultra |
City mapping with standard oblique camera systems (5-head configuration) | Aerial Oblique |
| Ultra |
UAV projects. Optimal trade-off between quality and performance | Default |
| High (standard) |
City Mapping with custom camera systems or UAVs in which maximum output quality is required | Default |
| Ultra (optional) |