2.5D Tool for custom workflows
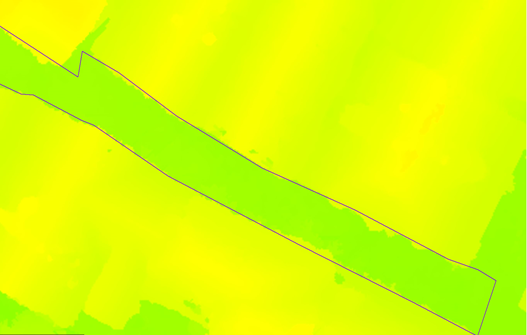
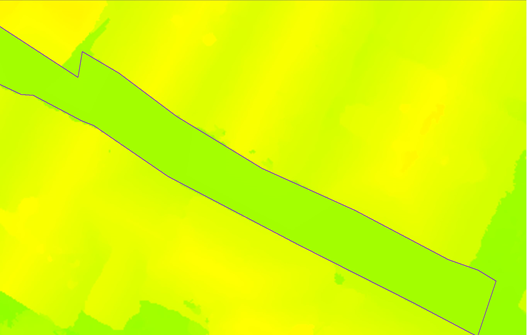
Rough surfaces near water bodies or areas with low image texture can sometimes cause artifacts or gaps in the input DSM, which is the geometric basis of the true orthophoto calculation. To achieve true orthophotos of excellent quality, these imperfections need to be removed.
SURE gives you the opportunity to revise and edit the DSM prior to processing further products such as True Ortho, 2.5D Mesh, or 3D Mesh. If corrections are made, the 2.5D Tool feeds the edited DSM back into the pipeline in order to achieve improved final results.
Ultimately, the 2.5D Tool enables you to refine your final products at an intermediate step, sparing you processing time and resources.
Step 1: SURE Data Preparation
Process the dense matching clouds and the DSM with SURE, but leave out the True Ortho and DSM Mesh stages.
Step 2: QA
Perform the QA process, for example with the SURE Image viewer or in any GIS software.
Step 3: Editing
There are several ways in correcting the DSM_Raw clouds:
either by editing the input DSM Clouds,
or just by interpolating the height from the digitized 3D shapefiles over the area containing the artifacts.
Editing DSM_Raw clouds:
Load and edit the affected DSM Cloud tiles, with your preferred point cloud editor, e.g. CloudCompare. Modify the clouds as needed and even complement the clouds using data from other sources.
Save the edited clouds in a separate folder to avoid overwriting of original data.
We recommend working on the DSM_Raw Clouds, since at this stage DSM rasterization has already been carried out and the amount of points is reduced significantly compared to the Dense Matching Clouds.
Digitizing 3D polygon Shapefiles for DSM/TrueOrhto improvements:
During QA the user can digitize polygons over the problematic areas in any GIS/stereo viewer application having as an overlay the DSM/TrueOrtho
the problematic areas can be also automatically identified with the help of the DSM Metainformation Layers SURE generates.
Export these polygons as 3D Shapefiles where each vertex of the shapefile has the correct height.
Step 4: Feeding the modified data back into the SURE pipeline
Open the 2.5D Tool. You can find it in the "Tools" section in the GUI's file menu in the processed project.
In case the DSM_Raw clouds were edited:
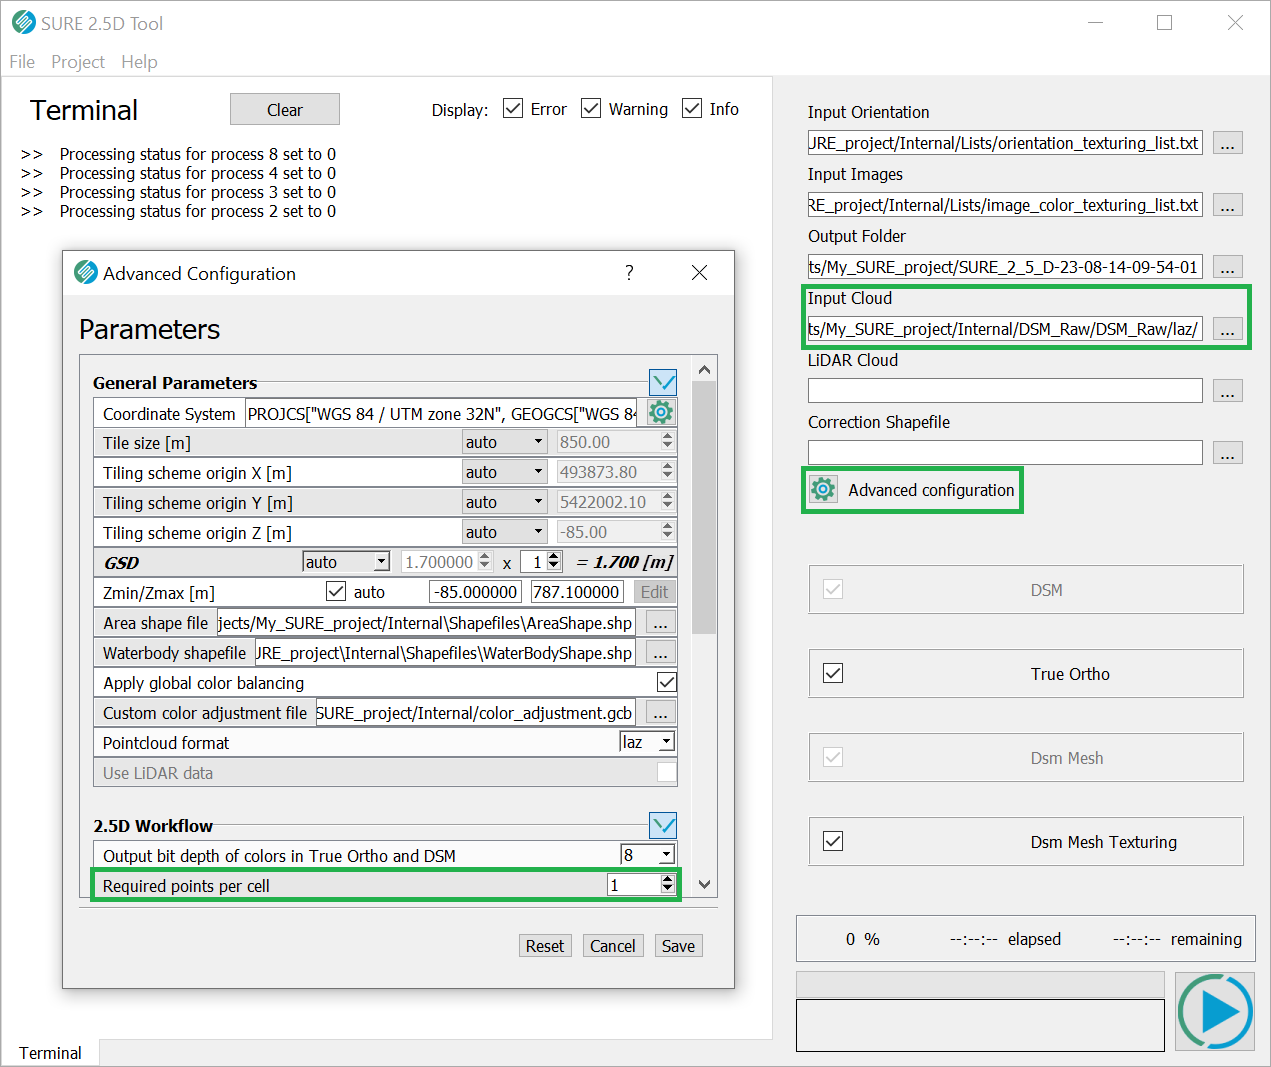
For "Input Cloud", specify the folder with the edited DSM_Raw clouds plus the neighboring DSM_Raw cloud tiles. The neighboring DSM_Raw clouds are needed in order to generate consistent results.
Using digitized 3D Shapefiles:
Keep the "Input Cloud" field at the default value (
\Internal\DSM_Raw\DSM_raw\las).Import the digitized 3D Shapefiles as a waterbody shapefile.
Adjust the parametrization from the Advanced Configuration Toolbox:
Among the 2.5D workflow parameters, set the "Required points per cell" value to "1".
Adjust parameters as required. Visit our Project Configuration page for details.
Select the desired processing outputs (True Ortho, DSM Mesh, DSM Mesh Texturing) and start the process by pressing the small play button in the lower right corner.
DSM stage reprocessing
Please note that also the DSM stage will be processed again on the basis of the modified point clouds. However, since the rasterization of the dense clouds has already been carried out during the original run of the DSM module, the DSM stage will be finished in a fraction of the time needed for the original DSM generation.
See also
Use 3D Shapefiles to edit DSM, True Ortho and DSM Meshes in the SURE Editor