Scaling Production with Distributed Processing
This page describes the steps required to set up and monitor a Distributed Processing project. To learn how Distributed Processing works in SURE please visit our Distributed Processing Basics page. For common questions on Distributed Processing and troubleshooting visit our Distributed Processing FAQ & Troubleshooting page.
Before You Start
Checklist
All machines to be used in Distributed Processing follow our Hardware Recommendations.
All machines are in the same network.
SURE is installed on all machines and a license is activated in each one. Visit Quick Start for details.
All machines in the cluster have “read“ access to the Network Image Directory that is specified on the Master computer. The Master computer has “read” and “write” access.
Setting Up a DP Project
Once you have confirmed all the prerequisites are met, follow these two steps:
Set up a Project on the Master machine
Activate Distributed Processing.
Select a Network Image Directory on a central (network) storage, where all machines have access.
Start processing.
Start a Node on all machines in the processing cluster
Double click on the SURE-Node.exe application from the SURE installation folder, or:
Call SURE-Node in a Terminal
Hint: If your Network Image Directory can be accessed under the same path on all machines, the SURE Nodes will automatically be able to access the images. Otherwise, you can configure your Network Image Directory manually.
Network Image Directory should be specified distinctly from the Input Images source.
Further Options and Optimization
Firewall permissions
For unhindered communication between processing Nodes and the Master machines, permissions for the SURE DP applications may have to be explicitly given through Windows Firewall.
SURE-Node Workspace
A directory where the node receives, processes, and generates data.
Network Image Directory
Flexible scaling of cluster size
You can add / remove machines in the processing cluster, on-demand, by turning on / off the SURE-Node application on the respective computers.
The Master machine can host a processing node as well. Simply start the SURE-Node application in the same way as for the other computers in the cluster.
GUI:
Project definition wizard 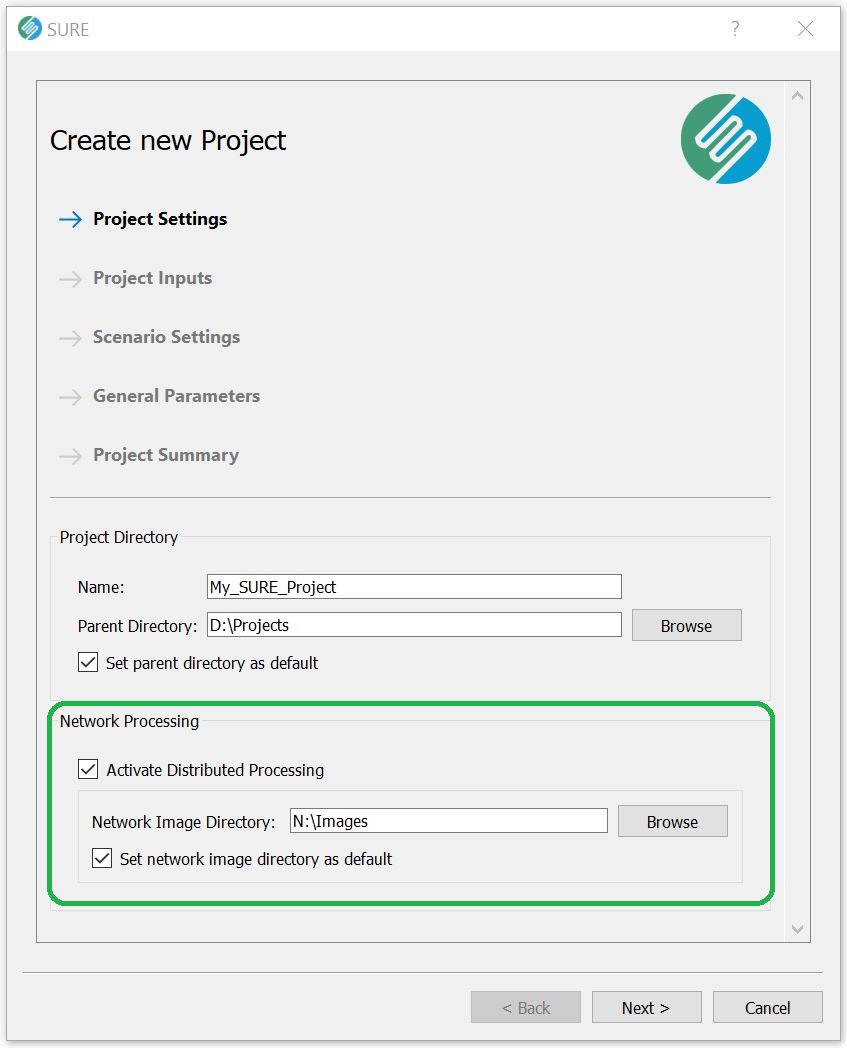
|
Advanced Configuration 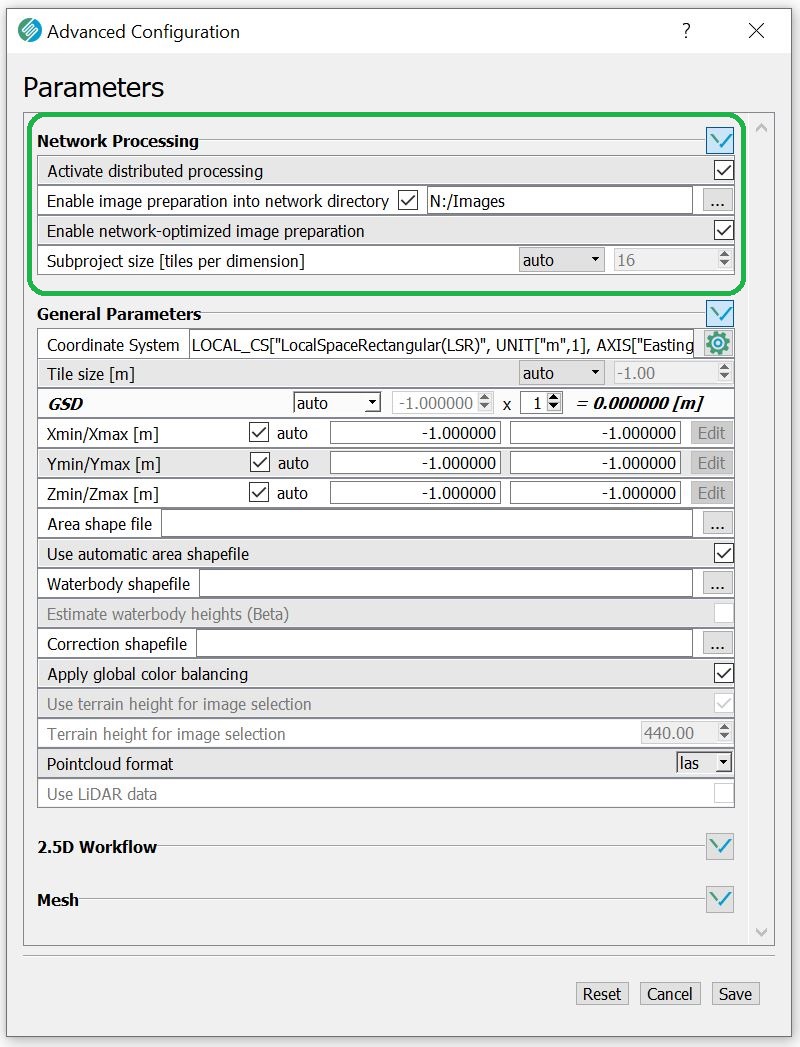
|
SURE GUI: File → Preferences 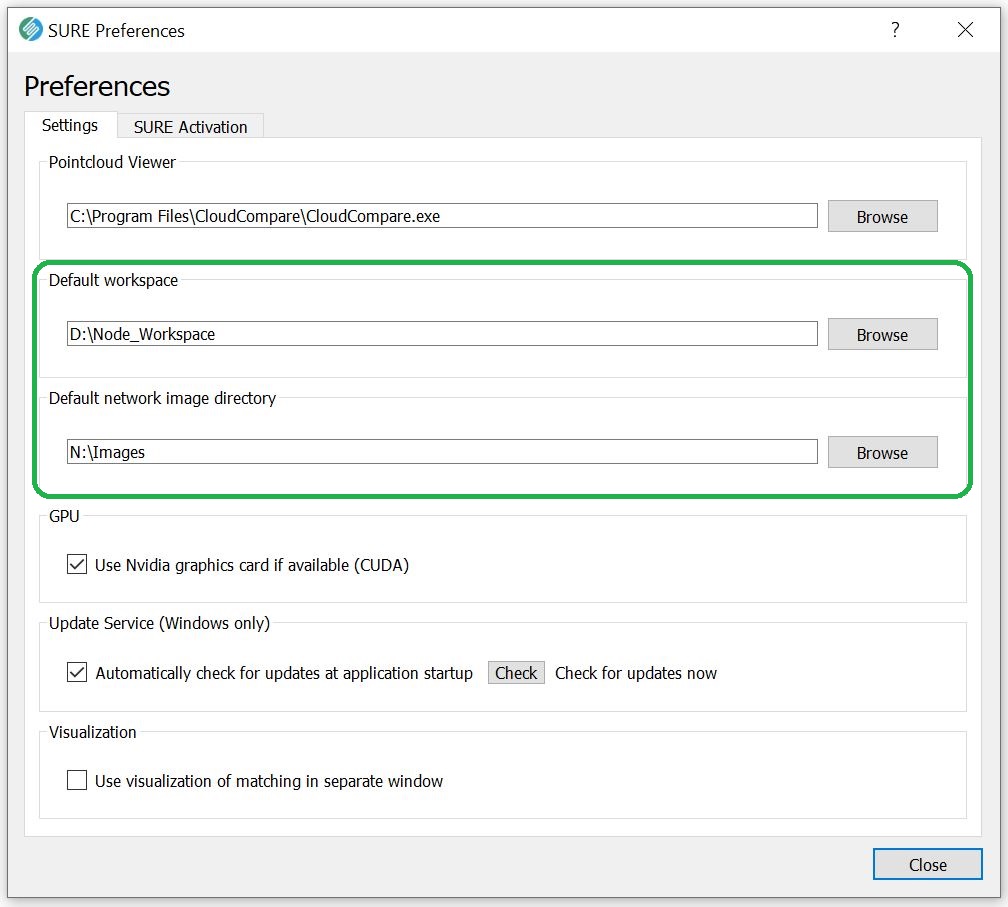 |
CLI:
SURE ... --distributed-processing --network-image-directory <path> ...
SURE-Node --workspace <workspace> --network-image-directory <path>
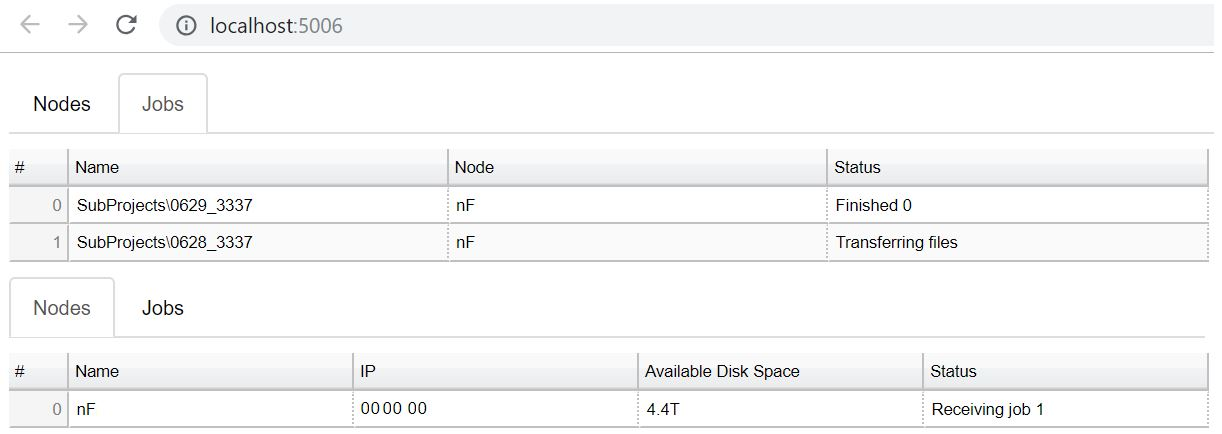
Monitoring a DP Project
Once the Analysis step is shown as 'Finished' in the Project Status tab, the Master will start to distribute sub-projects to all processing nodes. At this stage you can monitor the progress of your Distributed Processing project as follows:
The Project Status tab will display the Sub-projects that were created. Each sub-project will have a status bar specifying whether it is pending, running, or finished.
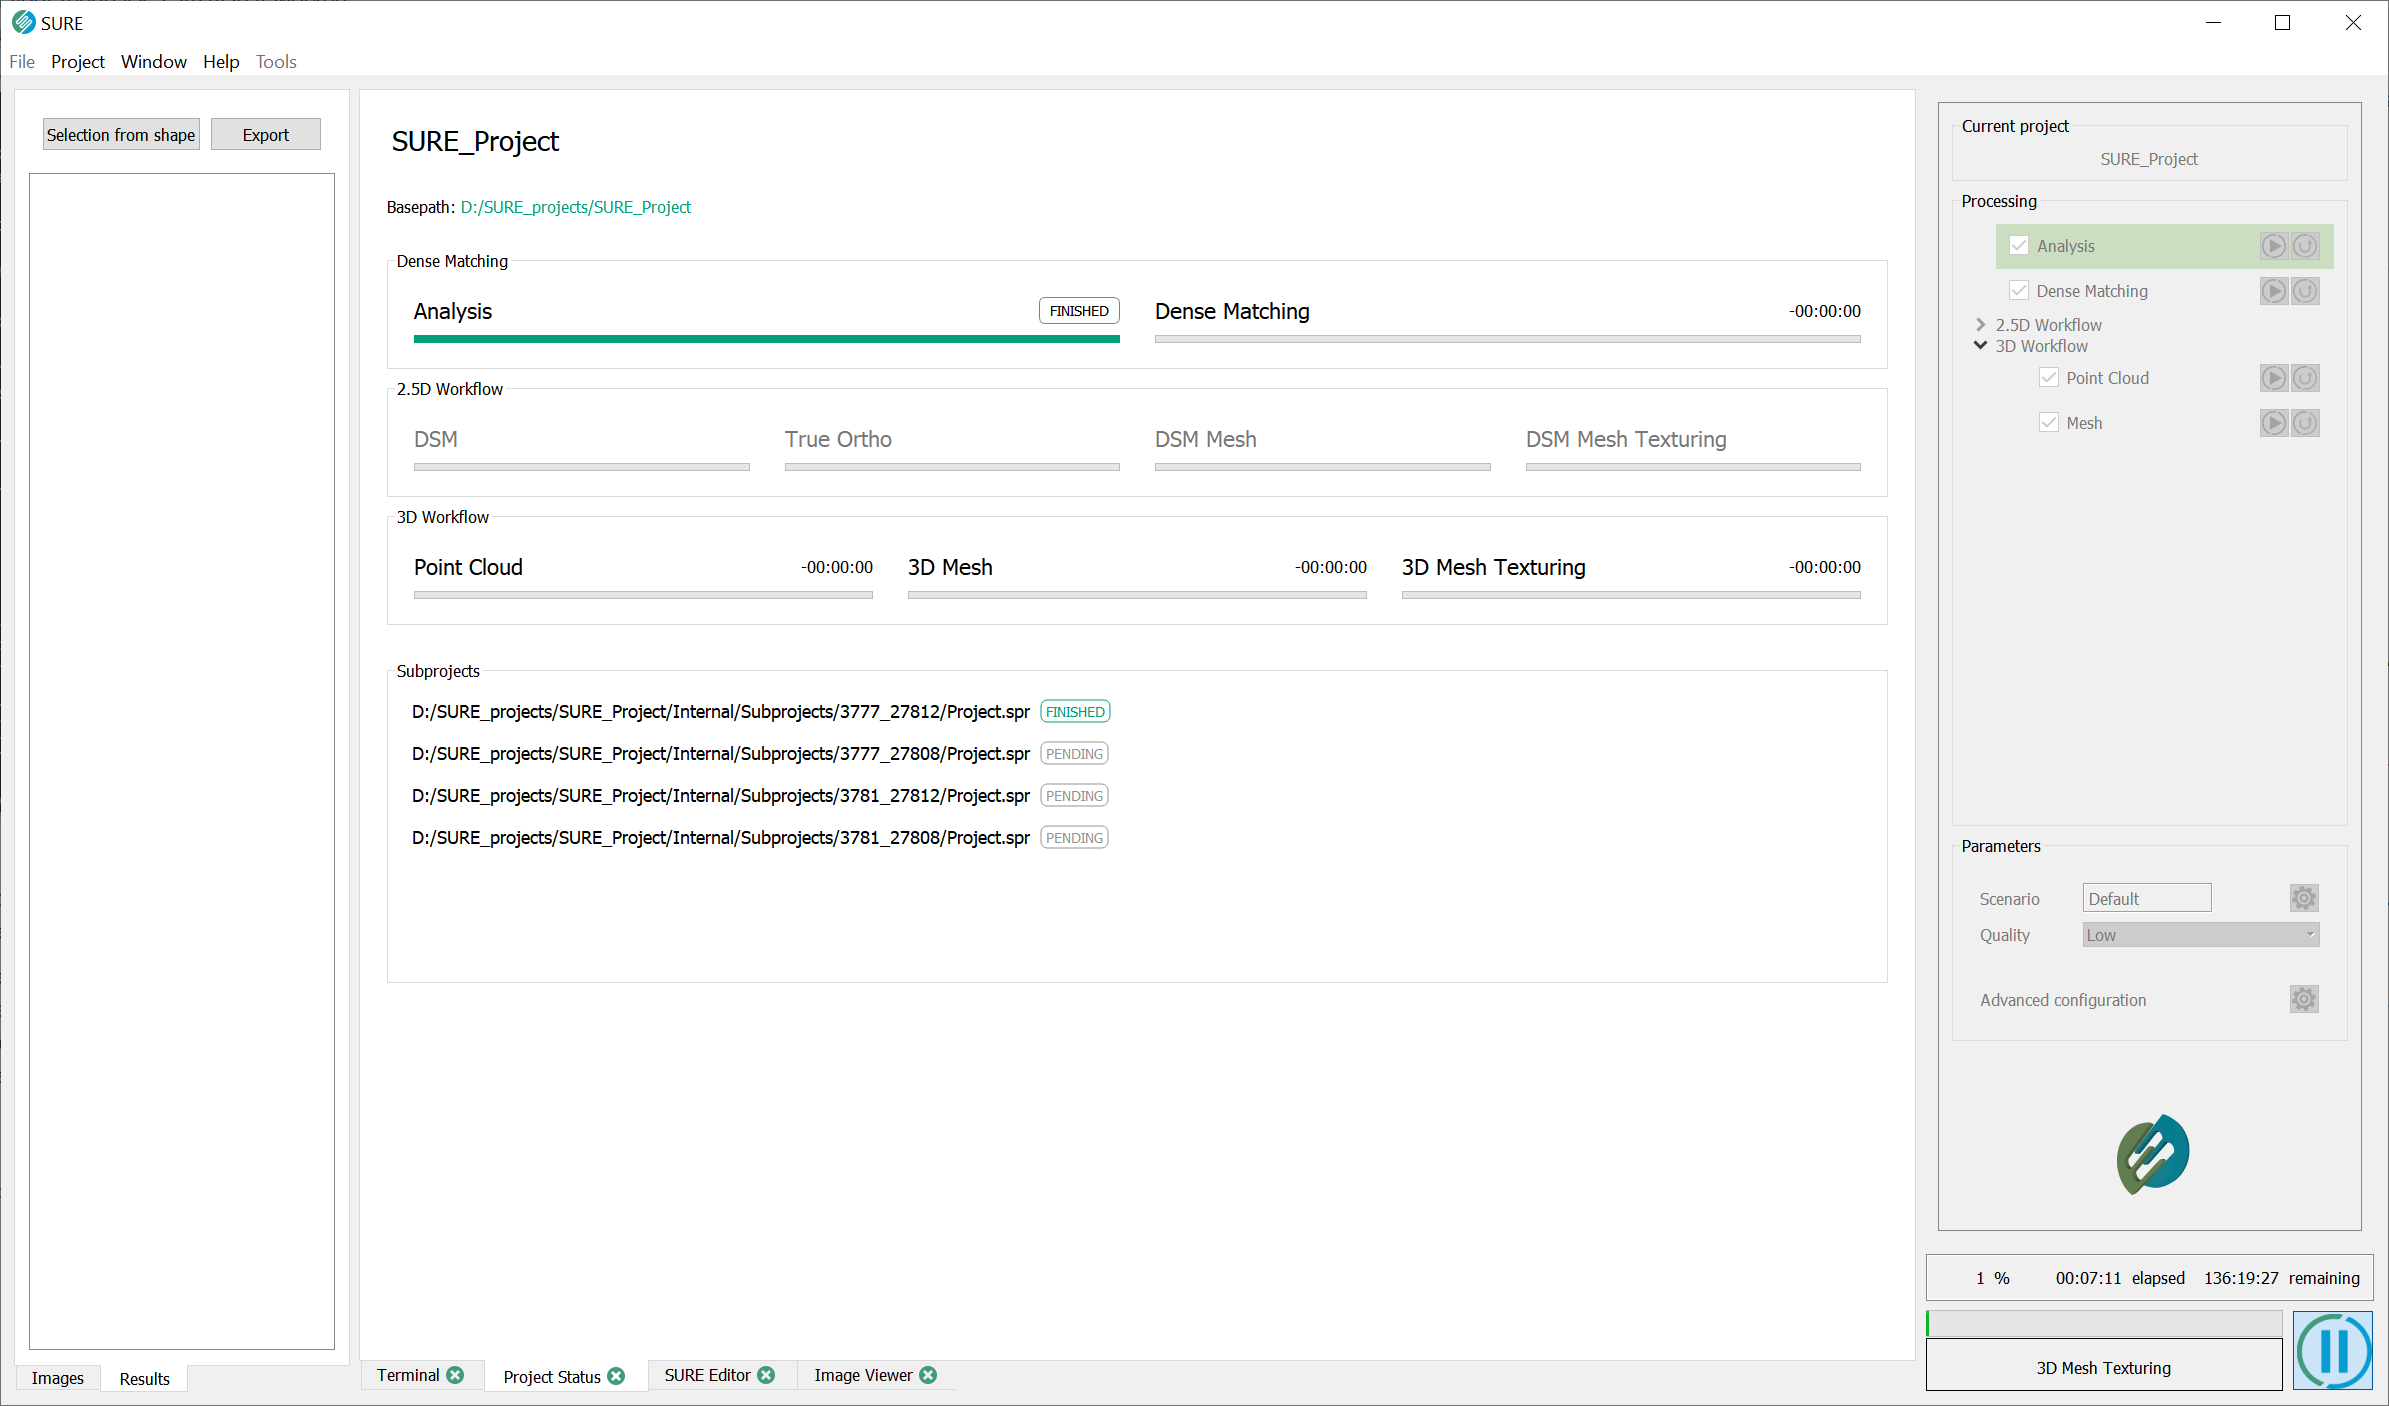
The Cluster Manager should automatically open in a new window of your default browser. Here you can obtain information on the cluster such as the nodes that are currently connected and the status of the task each node is carrying out. If the window does not open or you accidentally close it, navigate to "localhost:5006" via the address bar of the browser.
Results
Results from each sub-project are available as soon as the sub-project status is set to ‘Finished’ in the Project Status tab. These results are available in: Project_Folder\Results.
Once all sub-projects are finished, the Master node will generate the additional overview levels in the Mesh results. Once completed, all results are available in the usual directory Project_Folder\Results.